Soil moisture sensors have become a must-have tool for smart gardening, farming automation, and even school projects. Whether you’re building a smart plant watering system or monitoring soil for crops, a soil moisture sensor is the brain behind it all.
But what exactly is a soil moisture sensor? How does it work? Which one should you choose? And how does it compare with other soil moisture modules available in the market?
Let’s break it down in this beginner-friendly, no-fluff guide.
🌱 What is a Soil Moisture Sensor?
Contents
- 1 🌱 What is a Soil Moisture Sensor?
- 2 ⚙️ How Does a Soil Moisture Sensor Work?
- 3 🧰 Components of a Soil Moisture Sensor Module
- 4 🖥️ Typical Specifications
- 5 🪴 Applications of Soil Moisture Sensors
- 6 🧪 How to Use a Soil Moisture Sensor with Arduino
- 7 ✅ Advantages of Using Soil Moisture Sensors
- 8 ❌ Limitations
- 9 🔁 Comparison: Capacitive vs Resistive Soil Moisture Sensor
- 10 🔍 Other Soil Moisture Modules (Compared)
- 11 💡 Choosing the Right Sensor (Based on Use Case)
- 12 📈 Calibration Tip for Better Accuracy
- 13 🤖 DIY Smart Watering System (Bonus Idea)
- 14 ❓ FAQs
- 15 🧾 Final Thoughts
A soil moisture sensor is an electronic device used to measure the water content (moisture level) in the soil. It helps determine whether the soil is too dry, too wet, or just right for plant growth.
These sensors are used in:
- Home gardening
- Greenhouses
- Agricultural irrigation systems
- DIY electronics projects
They’re affordable, easy to use, and perfect for beginners and professionals alike.
⚙️ How Does a Soil Moisture Sensor Work?
Most basic soil moisture sensors use electrical resistance or capacitive sensing to measure soil moisture.
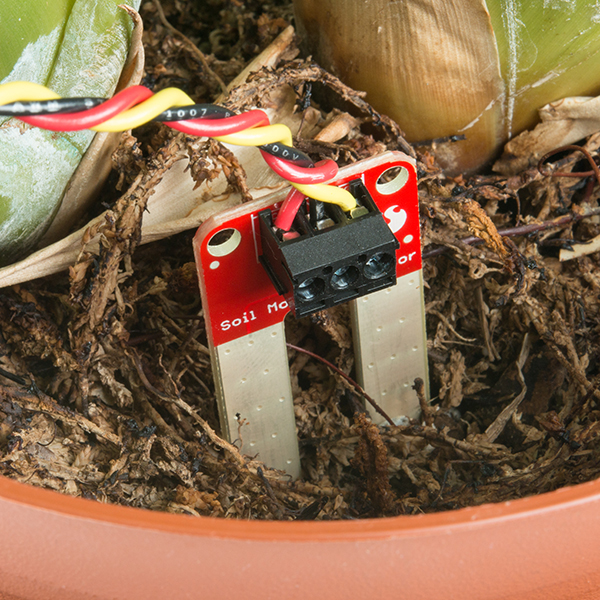
1. Resistive Soil Moisture Sensors
These are the most common type. They have two exposed metal probes that you insert into the soil. When water is present, it conducts electricity between the probes. More moisture = less resistance = more current flow.
2. Capacitive Soil Moisture Sensors
These use capacitive sensing (no exposed metal) and are less affected by corrosion over time. They detect moisture by measuring changes in the dielectric constant of the soil.
🧰 Components of a Soil Moisture Sensor Module
- Sensor Probes – Inserted into the soil
- Comparator IC (LM393) – Converts analog signal to digital (for modules)
- Adjustable Potentiometer – For sensitivity tuning
- Output Pins – Usually 3 or 4 pins (VCC, GND, A0, D0)
🖥️ Typical Specifications
| Parameter | Value |
|---|---|
| Operating Voltage | 3.3V – 5V |
| Output | Analog (A0), Digital (D0) |
| Power Consumption | Low |
| Response Time | Fast (real-time) |
| Sensor Type | Resistive / Capacitive |
| Lifespan | Depends on corrosion (resistive sensors wear out faster) |
🪴 Applications of Soil Moisture Sensors
- Smart plant watering systems
- Agricultural automation
- School and college projects
- Greenhouse monitoring
- Hydroponics and vertical farming
🧪 How to Use a Soil Moisture Sensor with Arduino
📦 Components Needed:
- Soil moisture sensor module
- Arduino Uno
- Jumper wires
- Breadboard
- Power supply
- LED (optional for indicator)
🔌 Circuit Connection:
| Sensor Pin | Connect To |
|---|---|
| VCC | 5V (Arduino) |
| GND | GND |
| A0 | A0 (Analog input) |
| D0 | D2 (Digital input, optional) |
🧾 Arduino Code:
cppCopyEditint sensorPin = A0;
int sensorValue = 0;

void setup() {
  Serial.begin(9600);
}

void loop() {
  sensorValue = analogRead(sensorPin);
  Serial.print("Soil Moisture: ");
  Serial.println(sensorValue);
  delay(1000);
}
💡 Tip: Lower values = dry soil, Higher values = moist soil
✅ Advantages of Using Soil Moisture Sensors

- Automates watering
- Prevents plant overwatering
- Saves water and resources
- Improves plant health
- Great for STEM and IoT learning
❌ Limitations
- Resistive sensors corrode over time
- Readings can be influenced by soil type
- Requires calibration for accurate results
- Not waterproof by default (unless sealed)
🔁 Comparison: Capacitive vs Resistive Soil Moisture Sensor
| Feature | Resistive Sensor | Capacitive Sensor |
|---|---|---|
| Price | Very cheap (~$1) | Slightly expensive (~$2–$4) |
| Lifespan | Low (due to corrosion) | High (sealed electronics) |
| Accuracy | Medium | High |
| Power Consumption | Low | Low |
| Soil Insertion | Direct metal contact | Plastic-coated probe |
| Ideal For | Beginners, test projects | Long-term use, real systems |
🧠 Verdict:
If you’re just experimenting or learning — use resistive sensors.
If you’re building something long-term or outdoor — go for capacitive sensors.
🔍 Other Soil Moisture Modules (Compared)
There are a few variations you’ll find in the market:
1. YL-69 + LM393 Module (Resistive)
- Most common combo
- Analog + Digital output
- Needs calibration
- Cheap but rusts easily
2. HW-390 (Capacitive)
- Sealed plastic sensor
- Works longer in damp soil
- Great for permanent installations
3. DFRobot Gravity Sensor
- High-quality capacitive
- Stable readings
- More expensive ($7–$15)
- Waterproof and Arduino plug-and-play
4. Soil Hygrometer Sensor (I2C/Serial)
- More advanced
- Digital communication (I2C)
- Accurate and scalable
- Used in industrial/agriculture projects
💡 Choosing the Right Sensor (Based on Use Case)
| Use Case | Recommended Sensor |
|---|---|
| School Project | YL-69 Resistive |
| Arduino Hobby Project | Capacitive HW-390 |
| Home Gardening | Capacitive or DFRobot Gravity |
| Commercial Farming | I2C Soil Hygrometer or Wireless Sensor |
| Outdoor Long-Term Use | Waterproof Capacitive |
📈 Calibration Tip for Better Accuracy
Each soil type has different properties. To get accurate results:
- Measure sensor reading in completely dry soil (e.g., 0% moisture)
- Measure reading in fully wet soil (e.g., saturated with water)
- Use these as your min and max range
- Map the output in code using
map()function in Arduino
cppCopyEditint mappedValue = map(sensorValue, dryValue, wetValue, 0, 100);
🤖 DIY Smart Watering System (Bonus Idea)
You can use the soil moisture sensor with a relay and water pump to automatically water plants when soil is dry. Add an ESP8266 or NodeMCU for Wi-Fi-based alerts or control via mobile.
Want a step-by-step guide for that? Just let me know!
❓ FAQs
Q. Can I leave the sensor in soil permanently?
Resistive sensors corrode over time. For permanent use, choose capacitive or waterproof models.
Q. What’s a good value for dry vs wet soil?
- Dry soil: ~300–500
- Wet soil: ~800–1023
(Depends on sensor and soil type)
Q. Can I use it with Raspberry Pi?
Yes, but you’ll need an ADC converter since Raspberry Pi doesn’t have analog input by default.
Q. Is it safe to use outdoors?
Only if the sensor is waterproof or sealed properly. Cover exposed parts to avoid rust and short circuits.
🧾 Final Thoughts
Soil moisture sensors are incredibly useful for smart gardening and learning electronics. From plant lovers to IoT developers, this small sensor can transform the way we manage soil and water.
Here’s a quick recap:
- BO motor is a geared DC motor – ideal for simple movement-based tasks
- Soil moisture sensor – essential for smart watering systems
- Use resistive sensors for learning; use capacitive sensors for durability
- Compare features, accuracy, and lifespan before picking one
With the right sensor and a bit of code, you can automate your garden, build a plant-saving robot, or take your next school project to the next level.